Archive
SQL Server 2017 Setup error – VS Shell installation has failed with exit code 1638
Today while installing SQL Server 2017 on my PC I got this popup on the Installation Progress tab. Earlier I had installed SQL Server 2017 but had to uninstall it for some reason. Now today while re-installing it I was getting this error.
TITLE: Microsoft SQL Server 2017 Setup
——————————
The following error has occurred:VS Shell installation has failed with exit code 1638.
——————————
BUTTONS: OK
——————————
… and once you click OK, the installation resumes, but ends in error again, with following error details:
Error details:
§ Error installing Microsoft Visual C++ 2015 Redistributable
VS Shell installation has failed with exit code 1638.
Error code: 1638
Log file: C:\Program Files\Microsoft SQL Server\140\Setup Bootstrap\Log\20180824_225215\VCRuntime140_x64_Cpu64_1.log
Visit https://go.microsoft.com/fwlink?LinkId=20476&ProdName=Microsoft+SQL+Server&EvtSrc=setup.rll&EvtID=50000 &ProdVer=14.0.1000.169&EvtType=VCRuntime140_x64%40Install%400×1638 to get help on troubleshooting.
Resolution:
– As per the second error, the SQL Server setup tries to install Microsoft Visual C++ 2015 Redistributable, but as I already have Visual Studio 2017 installed, thus it is failing to install a previous version of VC++, so you need to:
1. Uninstall Visual Studio 2017.
2. Install SQL Server 2017
3. Install Visual Studio 2017 back again.
– Or, rather than uninstalling whole VS 2017, you can simply:
1. Uninstall the VC++ 2017 Redistributable
2. Install SQL Server 2017
3. Install the VC++ 2017 Redistributable (download: x86, x64)


Download SQL Server 2017 for free (with full MSBI stack)
With SQL Server 2014 Microsoft made its SQL Server Developer Edition free for Development and Test database in a non-production environment. This edition is not meant for Production environments or for use with production data.

With SQL Server 2017 Developer edition developers can build any kind of application on top of SQL Server. It includes all the functionality of Enterprise edition, but is licensed for use as a development and test system, not as a production server.
So, with this free edition you get the Database Engine as well as full MSBI stack with DW/BI capabilities ( i.e. SSIS /AS /RS) for free 🙂
Downloads here:
– SQL Server 2017 Developer Edition
– SQL Server Management Studio (SSMS, latest version)
– Sample databases for SQL Server [AdventureWorks] [Wide World Importers]
Create a new Azure SQL Database (on PaaS) step by step
Azure SQL Database is a Microsoft’s cloud based service on Microsoft on premise version of SQL Server relational database. It is a fully-managed relational cloud database service built for developers.
–> Today we will see how you can create a new SQL Database on Microsoft Azure:
1. Please make sure you have a Azure Account and Subscription.
2. Go to Microsoft Azure portal:
– In the menu, click New
– Select the Databases in the Azure Marketplace blade
– Click SQL Database

3. In the SQL Database blade enter the following settings:
– Name: MyFirstAzureSQLDB
– Subscription: Select your Azure Subscription
– Resource Group: Select the Resource Group, or create new
– Select source: We will choose here “Sample (AdventureWorksLT)”
– Server: Create a new logical server with following settings:
– Server name: Provide a globally unique name
– Server admin login: Provide a valid user name of your choice
– Password: Provide a valid password
– Location: Select a valid location
– Allow azure services to access server: Select the check box

– Want to use SQL elastic pool? Select “Not now”
– Pricing tier: As you click on this option you will be taken to the Configure Performance blade, select Basic for now, but you can choose higher tiers as per your workloads and needs.

– Collation: Leave it as default, SQL_Latin1_General_CP1_CI_AS
– Pin to dashboard: Select the check box
4. Finally click the Create button on the main blade. Provisioning a new SQL Database takes few minutes and you can see the deployment progress at the Top-Right corner of your portal. And once the deployment is done you will see following message at the same place:


5. Now as you had selected to pin the new Database, so you should be able to see it in your dashboard like this:

6. Click on the shortcut and you will be taken to its Settings and Properties, where you can check resources, various options, tweak settings and do some admin related stuff.
7. The portal also provides a basic Query Editor to execute SQL Queries, check data in tables, and explore the database, check some DB objects, etc. After selecting the Query Editor you can click on Login button at the top. Provide the User Name and Password you applied while creating the Database.

8. Try explore the Sample Database, it gives limited feature to check Tables, Views and SPs. You can try writing a SQL Query and Run against the tables/views, or execute the SPs. The results will be shown in pane below.

9. You can also connect to this Azure SQL Database from SSMS installed in you PC or a remote server, which I’ll show in my next [blog post].
–> Terms used above:
1. Resource Group: is a collection of resources that share the same life cycle, permissions, and policies.
2. Server: or Logical Server acts as a central administrative point for multiple databases, including elastic pools logins, firewall rules, auditing rules, threat detection policies, and failover groups.
3. DTU (or Database Transaction Units): Microsoft guarantees a certain level of resources for that database (independent of any other database in the Azure cloud) and providing a predictable level of performance. This amount of resources is calculated as a number of Database Transaction Units or DTUs, and is a blended measure of CPU, memory, I/O (data and transaction log I/O).
4. Elastic Pools: provide a simple and cost effective solution for managing the performance of multiple databases within a fixed budget. An elastic pool provides compute (eDTUs) and storage resources that are shared between all the databases it contains. Databases within a pool only use the resources they need, when they need them, within configurable limits. The price of a pool is based only on the amount of resources configured and is independent of the number of databases it contains.
Seeking response on: LDAP Authentication with SQL Server 2017 on Linux
Few days back I got an email from one of the reader of this blog “Amit Bhatt”. As I haven’t worked much with the AD/LDAP stuff, thus I thought to throw this question to you guys thru this blog post. I also feel this may also help other Developers/DBAs hunting for similar stuff.
Here he goes:
We have installed SQL Server 2017 on Linux server. I am able to connect SQL Server locally as well remotely but with local user access.
I have my AD account created and have AD server information. Can you please help me how can I connect using my AD account to SQL Server 2017 on Linux remotely?
I heard something about LDAP Authentication. Is it possible to use this concept without adding Linux server to AD domain? Our security team does not allow to add Linux server in Active Directory group.
I am stucked here since last many days, requesting assistance on urgent basis.
Please provide your suggestion on the comment section below.
–> Responses:
1. To support AD Authentication, SQL depends on SSSD, SPN and a keytab file which have the required tokens to talk to AD. Without these in place SQL cannot talk to AD which is necessary for AD authentication.
Ref: https://docs.microsoft.com/en-us/sql/linux/sql-server-linux-active-directory-authentication
2. If you are looking to login to SQL Server on linux with Windows authentication the linux server should be joined to the domain. If the server cannot be added to domain then SQL authentication is the way to go. The below link has more details to configure windows authentication, https://docs.microsoft.com/en-us/sql/linux/sql-server-linux-active-directory-authentication
–> Videos on Linux:
2. Install SQL Server on Linux Azure VM
3. Connect SQL Server on Linux VM from SSMS
Download & Install SQL Server Reporting Services (SSRS) 2017 (decoupled from SQL Server engine setup)
In one of my [previous blog] post related to SQL Server 2017, I mentioned regarding SQL Server Reporting Services (SSRS) that it will no longer be installed from the main feature tree of SQL Server engine setup, just like SSMS.
In SQL Server 2016, the SSMS Setup was taken away from the SQL Setup
As per Microsoft, this is basically to support the move to make a universal version of SSRS that may ship more frequently that the whole SQL Server v-next.
So, now on wards after installing SQL Server 2017 you need to install SSRS separately, just like SSMS.
–> Till SQL Server 2016 you have an option of choosing “Reporting Services” in the Feature selection tree, but with SQL Server 2017 and on wards this option is taken out, can be seen in the pic below:

–> Now to download SSMS 2016 you can either visit the Microsoft [download page]
– Or –
Install directly via the “Installation Center” as shown below. This will install SSMS directly online.

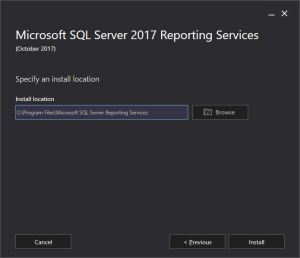
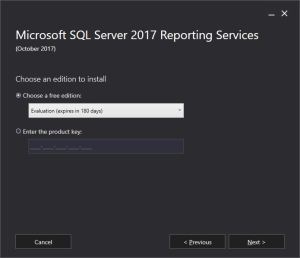
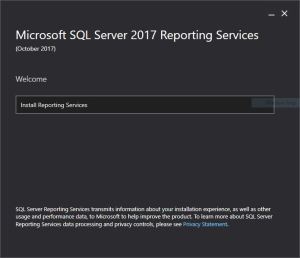
So, once you take appropriate action above to download SSRS 2017, the Installation kicks off like this:
-

- Click to expand
-

- Click to expand
-
- Click to expand
-

- Click to expand
-

- Click to expand
-
- Click to expand
-
- Click to expand
Check my blog posts on most of the new features released in SQL Server 2017.


![]()
Current Visitors

StatCounter …since April 2012

 Leisure blog: Creek & Trails
- NMDC Hyderabad Marathon – My first 42k FM, cramps, training and fuelling
- Singapore (Part 2) – 6 days itinerary, sightseeing & attractions
- Singapore (Part 1) – Tickets, Visa, Hotel, Forex Card/Cash, Metro/Bus cards
- I got full refund of my flight tickets during COVID lockdown (AirIndia via MakeMyTrip)
- YouTube – Your Google Ads account was cancelled due to no spend
- YouTube latest update on its YPP (YouTube Partner Program) which may affect your channel
- Starting your own blog !!!
- How to file ITR (Income Tax Return) online AY 2017-18 (for simple salaried)
- Scam – Become a kin/hier and earn a fortune – via LinkedIn and Email
- Places to visit in and around Vizag (aka Visakhapatnam)
